January 29, 2009

neat & easy roasted garlic

Lately I've been feeling a bit under the weather. I had a nasty cold last week and I ended up using my new day off to sleep and recover. I've been resting and trying to do everything I can to keep my immune systems up. At home Mom's advice was always hydration, orange juice and turkey soup with lots and lots of garlic.

Vitamin C is great for you immune system and I've been eating a grapefruit ever morning and orange cake in the evening. Garlic is also supposed to be good for your immune system, but how do you incorporate more garlic into your diet without eating it raw, and driving your loved ones and coworkers away? (Well, in some cases I wouldn't mind driving a certain coworker away)

Roasted garlic is a great condiment or appetizer. On salads, with salmon or roast beef or especially with chevre or SCD yogurt cheese and toast. The roasted garlic that my aunt taught me required a lidded, oven-safe dish and hours of cooking. Mom made this version at my cousin's house but when I got home, and got sick, I needed something quicker and easier. This is it.

Roasted Garlic
2 heads garlic
1 tbsp olive oil
1 tsp Italian herbs

Preheat oven to 350 F. break apart garlic heads into individual cloves, remove as much of the excess papery skin as possibly, leaving each clove in its own peel (if the individual peel does come off, it's no big deal). Trim the hard ends of each clove. Make a pouch out of two or three squares of aluminium foil. Place garlic, olive oil and herbs in pouch and twist closed. Place directly on oven rack and bake for about 1 hour and 15 minutes. Remove from oven and allow to cool. When foil is cool enough to touch, open foil pouch and extract roasted garlic from peels.

Serve with SCD yogurt cheese and toast/crackers or on a salad or with your favorite meat dish.

January 27, 2009

trainer's choice apricot almond bread


I may have mentioned that I make a variety of breads for the Trainer and I. The dark date & pecan spice bread was my first version. With a little tinkering I found a very successfull base and with each loaf I try something a little bit different, trying to find combinations that are especially good.

After our trip to Alaska, Mom liked the bread so much that she started making it for herself, Dad and just about anyone else she could give it to. Dad is very particular about his snacks and meals, he used the have 8 or 9 apricots and 8 or 9 ginger snaps as his evening snack, but somewhere along the line he switched to Mom's granola and apple crisp. This left Mom with a surplus of dried apricots and she decided to try the bread with apricots instead of prunes. For Christmas she sent a small loaf to the Trainer's family and gave us a larger loaf.

The Trainer liked her version and asked me to make my next loaf with apricots. When he had his first slice of this one he said that it was the best. Now, he says that about each loaf I put in front of him, except the gingerbread I'm working on, but he has continued to request this loaf "just the way it is".

Apricot Almond Bread
6oz (2c.) blanched almond meal
1 tsp cinnamon
1/2 tsp cardamom
1 tsp baking soda
1/4 tsp salt
4oz (1/2c., 15pc) dried apricots stewed in 1/2c. water
4oz applesauce
3 eggs, separated
1 tsp vinegar
2 tsp almond extract
1/2c (10pc) chopped dates or golden raisin
1/2c. chopped pecans

Preheat oven to 350° F and line a 9x3" loaf pan with parchment paper. Stew apricots in water. ( I discovered a neat trick to this, I put the fruit and water in a jar and leave it on the radiator for several hours) In a blender or food processor puree apricots, with water, egg yolks, applesauce and almond extract. In a separate bowl, combine almond meal, baking soda, cinnamon, cardamom and 1/8 tsp salt. Wipe down the inside of the bowl of an electric mixer with cider vinegar, place egg whites and 1/8 tsp salt in the bowl and beat to stiff peaks. Mix apricot puree and and almond meal. With a spatula carefully fold egg whites, dates and pecans into batter. Pour into prepared pan and bake for 50-60 minutes. Alow to cool for 1 hour before removing from pan and cooling on a wire rack.

January 25, 2009

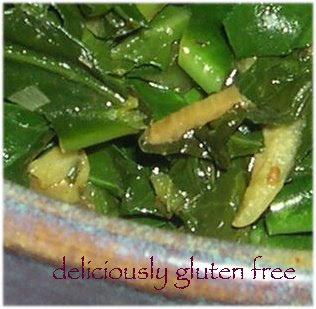
garlicky greens

People often say that food is the stuff of which memories are made. Many, many gatherings, both of family and friends revolve around food or involve food in some way. Folks reminisce about family Thanksgiving feasts, Christmas suppers or Easter dinners. But it's funny what can trigger your memory.

As long as I've been living on my own I've been cooking my greens, especially spinach with lots of garlic. That's how Mom used to cook spinach, and after the atrocious cafeteria food I wanted foods that were familiar. When I was little, fixing spinach with Mom, she used to tell me how her mother used to cook the spinach with a few whole cloves of garlic in an attempt to get Mom and my uncle to eat the spinach, but Mom and Ken used to fight over who would get the garlic, and still avoid eating the spinach. After that, for the sake of familial consistency, I cooked my spinach with garlic.

Now, I fix greens every week to carry to work with me. Spinach, swiss or red chard and collards. Lots of vitamins and fiber. As I was rolling and cutting my collards into ribbons to saute I remembered, as I often do, my late uncle Ken who taught me to cut leafy vegetables this way. I remember standing with him in out kitchen on one of his rare visits and learning to chop basil for pasta sauce. He lined all the leaves up and rolled them into a tight tube, this way he was able to easily hold the roll while slicing ribbons. More importantly, it was much easier me, with my small hands, to hold the vegetables and help in the kitchen.

After thinking of my uncle, who passed away in 2003, I knew exactly how I had to cook my collards. Chopped to ribbons and with lots of garlic. This makes a great side for any dish, a bed for fish or chicken, as well as great mix-in for soup.

Garlicky Greens

1 bunch collard greens (or any other type of greens)
3 cloves garlic
1 tbsp olive oil
salt
Wash and drip-dry the collards. Peel and mince the garlic. Place a large skillet on the stove and add olive oil and garlic. Turn on heat as low as possible. While oil and garlic are heating cut the greens in ribbons: taking 3 or 4 leaves at a time, cut off the bare length of stem, laying the leaves on top of each other, fold and roll the leaves, parallel to the stem. Holding the roll of leaves cut thin ribbons from the roll, either in a straight line of on an angle, in relation to the stem. As the leaves are cut, add them to the skillet, stirring each time. When all the greens have been added to the skillet, mix everything well and turn the heat up. Continue stirring until the greens are all bright green.

January 20, 2009

quinoa raisin cookies


As I mentioned before, my parents were here over the Christmas holiday. And, if I haven't mentioned, I am a daddy's girl. My father's daughter through and through. His favorite cookies are oatmeal raisin and his favorite pie is apple. I got VERY good at making apple crisps and oatmeal rainsin cookies.

Dad is one of those guys who already has everything, the ones that are impossible to shop for. Whenever he wants something he gets it for himself before anyone can get it for him. So, whenever I'm with Dad I try to make something special for him.

I put these cookies together with what I had in the apartment, quinoa that I can no longer eat, teff that I keep for the Trainer's pancakes and honey, the only sweetener I use. Of course I wasn't able to sample these but I am assured from the cookie connousour himself that they hit the spot. Mom agrees, and the Trainer wouldn't share the ones I saved for him with any one.

Quinoa Raisin Cookies
1/4 c. butter
1/2 c. honey
2 eggs
1 1/2 c. Teff flour
1 tsp baking soda
1/4 tsp salt
3 c. quinoa flakes
2 c. mixed black and golden raisins

Preheat oven to 325°F. In one bowl cream the butter, honey and eggs. Mix in the teff flour and baking soda. Slowly add the quinoa until it is all mixed in. Stir in raisins. Form into 2 tbsp size balls and place on a baking sheet. Bake for 10-12 minutes. Remove and cool on a rack.

January 11, 2009

quince & cream


I must appalogize for my quietude again. Things at work are in a shake-up due to the current economic situation. One of my favorite co-workers has decided that it's in her best interest to return to Columbia. A young woman who used to work with us is returning and it remains to see just how the office dynamic will evolve. I'm nervous and apprehensive about these changes, but we'll see how this plays out. In addition to these staffing changes all of us have been cut back to four days a week, with accompanying salary adjustments.

This week was my first four day week. I used my day off to have breakfast with the Trainer and then visit my storage unit and get some winter clothes, along with my ice skates. I packed myself all the way to the West Side and skated for the first time in almost a year.

I thought I'd have lots of time to cook and work on the site, and I plan too, but I just needed to get out on the ice. It felt so good. It'll take a lot of work to get all my skills back, but there's really nothing like figure skating, and being healthy enough to take the ice.

So this morning, having coffee with the Trainer I put together this little breakfast that just hit the spot. Poached quince with yogurt and nuts. A little bit of everything

Quince & Cream
1/4 (2pc) poached quince
2 Tbsp yogurt
1 Tbsp roasted nuts
Poached Quince:
4-5 quince, peeled, cored and cut in eighths
1 lemon washed and cut in half
1 vanilla bean, halvedd legnthwise
1/2 cup honey
water
In a medium size suace pan, place the quince, lemon, vanilla bean, honey and enough water to cover. Bring water to a boil and stir to make sure that honey is dissolved. Cover and simmer until quince are tender. Remove from heat and store in syrup. You can continue to cook down the syrup if you want it thicker.

Roasted Salted Nuts
6-8 oz mixed nuts, chopped if desired
1 tbsp sea salt
2 tbsp water
Preheat oven to 350° and line a baking pan with parchment paper. Toss nuts, water and salt ina bowl and mix so that all the salt dissolves and nuts are all moist. Spread nut mixture evenly on the baking sheet. Bake for 7-10 minutes. Allow to cool and store in an airtight container.

breakfast of champions, crispy-spicy kale


Happy New Year to all!

I must apologize for my extended hiatus. I only intended to be quite for a few days while my parents were in town. However, while the Trainer was hurriedly cleaning our room for a quick visit with my parents he dropped the computer with the power cord still plugged in. This necessitated a trip to the Apple store, and a I had to pay bail to get the computer back yesterday. And now we're back.

Now, I realize that this may not be every big city girl's dreams of a big bowl of greens for breakfast, but this kale is so good, I can't get enough of it. And along with a little bit of protein it's the perfect way to start the day. Simple, fast, filling and nutritious I've been having this for breakfast every morning.

Crispy-Spicy Kale
3-4 leaves kale
salt
turmeric
garam masala
olive oil
Pour about 1 tsp of olive oil into a heavy frying pan or cast iron skillet. Tear kale from the main stem and into bite size pieces, placing them in the skillet. Sprinkle with salt, a few shakes of garam masala and a generous amount of turmeric. Turn the burner on to the highest setting and start stirring the kale so that it all gets coated in seasoning and olive oil. Cook until all the kale is bright green and some pieces are starting to blacken and char.

Serve with eggs, tofu, cheese, yogurt or whatever else strikes your fancy, for breakfast, lunch or dinner.

The blackened pieces may look burnt, but they get nice and crispy before they actually char.