Showing posts with label Blood Type O. Show all posts

March 28, 2009

green beans with caramelized onions and almonds

This past weekend I took the Trainer home to Michigan for a quick visit. We got to watch Mom perform in the local ice show. I enjoyed showing the Trainer around the town I grew up in. Dad and I took him to Meijer's and almost lost him in the huge store. We drove him past my huge high school and my elementary school.

We walked around my neighborhood and I showed him where my grandmother lived and the 'closest' grocery store to our house. We toodled around downtown with my friend B and his fiancee J, stopping for coffee at the original Borders. The Trainer was amazed at how quite Ann Arbor is; he decided that he liked downtown but would have trouble adjusting to my quite and relative (compared to New York) isolation of my neighborhood.

Saturday night I pulled out several photo albums, showing the Trainer pictures of same of the litters of gerbil pups I raised in high school. Of course I also showed him pictures of myself when I was a babe. Our photo albums run out shortly after I turn 2, I must have kept Mom pretty busy. As I was looking through a book of all my awards and certificates I found what might have been my first two recipes.

Since Mom was so busy with the figure skating club and ice show I knew that Dad had been alone for dinner most nights for almost two weeks. Friday night we had some great post roast that Mom cooked in her clay pot and left for us but Saturday I fixed a special dinner for my two best guys.

Green Beans with Caramelized Onions and Almonds
1 lb green beans, cut into inch long pieces
1 small white onion, coarsely chopped
3 gloves garlic, minced
2 tablespoons olive oil
1/4 cup slivered almonds
In heavy pan or skillet pour in olive oil, garlic and onion. Turn heat on to medium and saute until onions are translucent. Add greens beans and raise temperature to high. Cover and cook, stirring occasionally, for about 5 minutes. Add almonds and stir briefly. Turn off heat and serve.

This was big hit, especially with Dad, since he loves caramelized onions and Mom rarely uses any extra oil in her cooking.

February 12, 2009

roasted salmon with lemon oil

This morning as I was cooking my spicy-crispy kale I thought about how our bodies tell us they need, if we're only able to listen. In going gluten free, and even following the Specific Carbohydrate Diet (SCD) I've longed for replications of baked goods and comfort foods that I used to have.

But when I think bake to me early childhood I wasn't a big fan of bread, or cake (even is I have always had a sweet tooth), or even pasta. I shied away from them when I was young, but somehow, when I learned that those thing made me ill, I wanted to find replacements. But those replacements don't agree with me either.

When I stop and listen to my body, it tells me that it wants protein. Meat, fish, poultry, any kind will do as long as it's protein. Fresh vegetables are great too, but right now my body wants meat. Whatever nutritionists may say, I know that I feel my all around best when I have more protein than anything else.

This then presents the challenge of how to eat my meat and enjoy it too, without getting bored and eating the same thing all the time. I try to mix things up, having fish a few days a week and I found this great roasted salmon recipe. It's great fresh from the oven, the left overs freeze well, and it's especially good cold over salad, the lemon oil negating the need for any type of salad dressing.

I hope you enjoy this as much as I am.

Roasted Salmon with Lemon Oil
1 large lemon
2 tbsp olive oil
4 6-8oz salmon fillets
kosher salt
fresh pepper

Set rack in the middle of oven and preheat to 450° F. Zest the lemon and mix zest and olive oil in a small bowl and set aside. Arrange the fillets on a heavy baking sheet, skin side down, sprinkle with salt and pepper. Roast the salmon for 10-13 minutes and remove from oven, immediately squeeze the lemon over the salmon. Arrange over fresh salad or cooked vegetable and drizzle with lemon infused olive oil.

February 4, 2009

roasted onion soup


When I was in college I belonged to the caving club. I was a WUSS*. Yes, I suited up in old clothes, put a helmet and light on my head and headed underground, towards the center of the earth. I'm not crazy, I come by this naturally, both my parents were active cave explorers when I was younger and I was underground long before I could walk. There's something so peaceful when it's just you, in the dark, with the living rock. In the Earth's womb.

But I digress, in the cold winter months there wasn't much caving going on in Ohio, even Southern Ohio. The highlight of those frigid weeks, when the ground was iced over and the sun was down long before classes were finished was Wednesday night caving club meetings. The faculty advisor was an old friend of Dad's and I had known he and his wife my whole life. The same was true for some of the other non-student members. Every week after the meeting some of us, the adults and officers, would go out for dinner at one of the local chain restaurants. Each week we went to a different place, but the need for warm comforting food was always the same. So many Wednesday nights I ordered French onion soup; warm, flavorful and decadent with molten cheese.

We had a frigid day and fairly significant snow, and walking home through the clear, crisp, chilly night I was overcome with a need to recreate that pungent soupy comfort. I've never made an onion soup before, but I do have lots of onions in the house and using the oven is a great way to add a little extra warmth to our little apartment. If roasting works for garlic I figured it would work just as well for onions. And I was right! I can think of so many flavor variations for this warm, comforting base

*WUSS stands for Wittenberg University Speleological Society. We used to say that "you have to be brave to be a WUSS"
Roasted Onion Soup
1 large yellow onion
5 shallots
1 bunch scallions
3 cloves garlic
2 tbsp olive oil
3 cups broth or water
salt and pepper

Preheat oven to 350° F. Have the onion and then slice it, same with the shallots, cut scallions into 1/2" sections and chop garlic. Toss chopped onion and garlic with olive oil and spread in a heavy baking dish. Bake for 45 minutes, stirring halfway through, until most onions are dark brown. When the onions come out of the oven immediately pour 1 cup of broth into the pan and scrape all the drippings from the bottom. Pour broth and onions into a sauce pan and add remaining 2 cups broth. Heat soup and add salt and pepper to taste.

To serve like french onion soup ladle into 3 or 4 oven safe bowls, top with toasted bread, croutons or roasted garlic biscuits and grated Gruyere cheese. place bowls on a baking sheet and place under the broiler or back into the oven until the cheese is melted, 7-10 minutes.

February 3, 2009

roasted garlic biscuits & croutons

After making my roasted garlic I started to think of other ways that I could use the flavor. I've been experimenting with savory breads, trying to make a roll, biscuit or scone that isn't so sweet. So many of the Specific Carbohydrate Diet recipes call for lots of butter of vegetable oil. I still seem to have problems with large amounts of dairy, probably the casein, and I'm trying to limit the amount of fat I add to recipes. The almond flour I use in baking adds plenty in the baking. I've discovered that it's a matter of adding just enough liquid to create a batter, rather than trying to recreate a standard recipe.

After making a reasonably successful scone with banana I decided to try using the roasted garlic to help mind the biscuits. You could probably oil the muffin tin, or use papers, but I found that by adding just a touch of olive oil in the bottom of each muffin cup helped the muffins slide out. These came out of the oven really crisp and dry, after sitting in the fridge overnight they attracted moisture and were much softer the next day. After toasting them as croutons they stayed nice and crisp for more than a week. To make this recipe specifically for croutons or bread sticks I would spread the batter in a 9x13 baking pan and then slice it into the desired shape for additional toasting

Roasted Garlic Biscuits
2 c. (6oz) almond flour
1 tsp baking soda
1/4 tsp salt
1/4 c. (2 heads) roasted garlic, smashed
2 eggs
1 tbsp olive oil
6 tsp olive oil for pan

Preheat oven to 350° F and place a standard size muffin pan inside the oven to heat. Mix dry ingredients to get out all the clumps. Mix in roasted garlic, eggs and 1 tbps olive until batter is smooth. Quickly, while the muffin pan is still warm, pour 1/2 tsp of olive oil in the bottom of each muffin spot, and then evenly fill with biscuit batter. Bake for 15 minutes, or until biscuits are very dry. Flip pan over to knock biscuits out, and then cool on rack. Serve immediately, or store in an airtight container. The biscuits will be nice and dry right after baking, but will take on moisture as they cool and sit. To dry them back out, place in a warm (120°-150°F) oven for several minutes or toast in a toaster oven. To make croutons, cut the biscuits into cubes, spread on a baking sheet and bake for 5-10 minutes in a warm (120°-150°F) oven. After the biscuits have been dried to croutons, they store well at room temperature in an airtight container

January 29, 2009

neat & easy roasted garlic

Lately I've been feeling a bit under the weather. I had a nasty cold last week and I ended up using my new day off to sleep and recover. I've been resting and trying to do everything I can to keep my immune systems up. At home Mom's advice was always hydration, orange juice and turkey soup with lots and lots of garlic.

Vitamin C is great for you immune system and I've been eating a grapefruit ever morning and orange cake in the evening. Garlic is also supposed to be good for your immune system, but how do you incorporate more garlic into your diet without eating it raw, and driving your loved ones and coworkers away? (Well, in some cases I wouldn't mind driving a certain coworker away)

Roasted garlic is a great condiment or appetizer. On salads, with salmon or roast beef or especially with chevre or SCD yogurt cheese and toast. The roasted garlic that my aunt taught me required a lidded, oven-safe dish and hours of cooking. Mom made this version at my cousin's house but when I got home, and got sick, I needed something quicker and easier. This is it.

Roasted Garlic
2 heads garlic
1 tbsp olive oil
1 tsp Italian herbs

Preheat oven to 350 F. break apart garlic heads into individual cloves, remove as much of the excess papery skin as possibly, leaving each clove in its own peel (if the individual peel does come off, it's no big deal). Trim the hard ends of each clove. Make a pouch out of two or three squares of aluminium foil. Place garlic, olive oil and herbs in pouch and twist closed. Place directly on oven rack and bake for about 1 hour and 15 minutes. Remove from oven and allow to cool. When foil is cool enough to touch, open foil pouch and extract roasted garlic from peels.

Serve with SCD yogurt cheese and toast/crackers or on a salad or with your favorite meat dish.

January 25, 2009

garlicky greens

People often say that food is the stuff of which memories are made. Many, many gatherings, both of family and friends revolve around food or involve food in some way. Folks reminisce about family Thanksgiving feasts, Christmas suppers or Easter dinners. But it's funny what can trigger your memory.

As long as I've been living on my own I've been cooking my greens, especially spinach with lots of garlic. That's how Mom used to cook spinach, and after the atrocious cafeteria food I wanted foods that were familiar. When I was little, fixing spinach with Mom, she used to tell me how her mother used to cook the spinach with a few whole cloves of garlic in an attempt to get Mom and my uncle to eat the spinach, but Mom and Ken used to fight over who would get the garlic, and still avoid eating the spinach. After that, for the sake of familial consistency, I cooked my spinach with garlic.

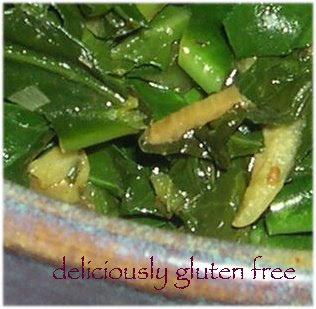
Now, I fix greens every week to carry to work with me. Spinach, swiss or red chard and collards. Lots of vitamins and fiber. As I was rolling and cutting my collards into ribbons to saute I remembered, as I often do, my late uncle Ken who taught me to cut leafy vegetables this way. I remember standing with him in out kitchen on one of his rare visits and learning to chop basil for pasta sauce. He lined all the leaves up and rolled them into a tight tube, this way he was able to easily hold the roll while slicing ribbons. More importantly, it was much easier me, with my small hands, to hold the vegetables and help in the kitchen.

After thinking of my uncle, who passed away in 2003, I knew exactly how I had to cook my collards. Chopped to ribbons and with lots of garlic. This makes a great side for any dish, a bed for fish or chicken, as well as great mix-in for soup.

Garlicky Greens

1 bunch collard greens (or any other type of greens)
3 cloves garlic
1 tbsp olive oil
salt
Wash and drip-dry the collards. Peel and mince the garlic. Place a large skillet on the stove and add olive oil and garlic. Turn on heat as low as possible. While oil and garlic are heating cut the greens in ribbons: taking 3 or 4 leaves at a time, cut off the bare length of stem, laying the leaves on top of each other, fold and roll the leaves, parallel to the stem. Holding the roll of leaves cut thin ribbons from the roll, either in a straight line of on an angle, in relation to the stem. As the leaves are cut, add them to the skillet, stirring each time. When all the greens have been added to the skillet, mix everything well and turn the heat up. Continue stirring until the greens are all bright green.

January 11, 2009

breakfast of champions, crispy-spicy kale


Happy New Year to all!

I must apologize for my extended hiatus. I only intended to be quite for a few days while my parents were in town. However, while the Trainer was hurriedly cleaning our room for a quick visit with my parents he dropped the computer with the power cord still plugged in. This necessitated a trip to the Apple store, and a I had to pay bail to get the computer back yesterday. And now we're back.

Now, I realize that this may not be every big city girl's dreams of a big bowl of greens for breakfast, but this kale is so good, I can't get enough of it. And along with a little bit of protein it's the perfect way to start the day. Simple, fast, filling and nutritious I've been having this for breakfast every morning.

Crispy-Spicy Kale
3-4 leaves kale
salt
turmeric
garam masala
olive oil
Pour about 1 tsp of olive oil into a heavy frying pan or cast iron skillet. Tear kale from the main stem and into bite size pieces, placing them in the skillet. Sprinkle with salt, a few shakes of garam masala and a generous amount of turmeric. Turn the burner on to the highest setting and start stirring the kale so that it all gets coated in seasoning and olive oil. Cook until all the kale is bright green and some pieces are starting to blacken and char.

Serve with eggs, tofu, cheese, yogurt or whatever else strikes your fancy, for breakfast, lunch or dinner.

The blackened pieces may look burnt, but they get nice and crispy before they actually char.

December 22, 2008

pot roast

Maybe it's the weather, or the season, or maybe it's all the added stress at work due to the current economic situation. Maybe a girl doesn't really need a reason to crave comfort food. Something simple and satisfying that warms from the inside out after a day or romping in the snow or trudging through the cold.

Many of Mom's best recipes are so simple. Her pot roast is one of those, a few veggies, some meat, a dash of love and perfect meal is born. I was never a picky eater who pushed food around my plate or didn't let my vegetables to touch, but I still had my idiosyncrases. I remember that I used to eat my pot roast in a very specific order; first mash the potatoes and carrots to soak up the juice, then the pearl onions and then the meat (always save the best for last). Then, if there was any juice left, soak that up with a slice of bread, just like Dad. Oh, yes. I am my father's daughter through and through.

This pot roast is the simplest thing ever, and is perfect for any type of variation that pleases you. Every once in a while Mom would add peas at the very end, so that they didn't cook to long. I have left the potatoes out of this recipes, but Mom usualy used red skins or new potatoes.

Pot Roast
1 Sirloin 'spoon' roast, 3-6 pounds
1 tbsp olive oil
4 peeled tomatoes*
1 onion, quartered or a bag of pearl onions
2 carrots, quartered
3-4 bay leaves
Salt
Water

In a large, heavy pot heat the olive oil and salt the roast. Sear all sides of the roast, about a minute on each side. Turn down heat and rest meat in pot. Place tomatoes, onions and carrots around the meat. Pour 2-4 cups of water into the pot, at least until the meat is half covered, and add the bay leaves. Cover and cook on very low heat for at least 3 hours, preferably 5, turning the meat over halfway through. If the broth seems to thin, remove the top and cook uncovered for the last half hour.

*To quickly peel fresh tomatoes wash the tomatoes, cut out the stem and score the top with an X. Place tomatoes top down in a large bowl or pot. Pour boiling water over tomatoes** and allow to sit for several minutes. Remove tomatoes and rinse with cold water if they are too hot to handle. Skins should slip right off.

**I like to save this water and use it to cook the roast in, that way I don't loose any of the tomato juices.

December 21, 2008

go ahead honey, it's gluten free! lucky foods

This month Heather at Life Gluten Free is hosting a new years lucky food edition of "Go ahead honey, it's gluten free". She wants us to prepare foods that are traditionally thought to bring luck in the year to come.

Now, when it comes to religious holidays and Western observances the Trainer and I are conscientious abstainers. We will be joining my parents and extended family on Thursday, but we will light the candles, bring in the evergreen bough and serve our lucky food today, on the shortest day of the year. The Winter Solstice.

Every native culture recognizes the winter solstice. Many Northern cultures display evergreens and burn lights to welcome back the sun and symbolize the eternal life of the sun. In the Trainer's country the Quechua, like their Inca forbears, are celebrating the inti rayme, a harvest festival celebrating the longest day of the year.

In ancient Rome both the Saturnalia and the festival of Sol Invictus fell on or near the shortest day of the year. They celebrated with a day or more of feasting and social role reversals. Decorating homes and cities with lights and evergreens. Customary gifts of good luck were dates, figs and nuts and the feast often centered around a stuffed suckling pig. The Romans were very fond of stuffing things, so this year we've prepared stuffed figs and dates.

Fructus Troianum*
Stuffed Fruits
1/2c. almonds
1/2tsp almond extract
1/2tsp cinnamon
20 dates
1/2c. walnuts
1/2 tsp vanilla extract
15 figs
water

Soak the almonds and walnuts for several hours and then rinse well. In a blender, grind the almonds, almond extract and cinnamon, adding water a tablespoon at a time until a paste forms. Slice dates on one side only, remove pit at fill with almond paste. Make a paste with the walnuts in the same way. Steam the figs over boiling water for 5-6 minutes to plump them. Cut the stems from the figs and cut a cross in the top half to open them. Fill figs with walnut paste. If you want the fruit a little dryer heat the oven to 350° then turn it off and place the fruit inside for several hours.

*This is a whole other story, but the Romans believed that they were descended from Aeneas, a prince of Troy and a group of Torjan who escaped to Italy after the war. Romans called stuffed suckling pig porcum troianum as a reference to the Trojan Horse.

November 11, 2008

Saag

Before there was the Trainer there was Bob the Builder. Not a builder, as such, but with enough time, a few tokes and a lot of grunting he could fix just about anything. A comfortable guy, many years my senior, he was just not The One.

Bob the Builder was a great guy and I learned a lot from my time with him. He's a vegetarian and he introduced me to various veggie-friendly cuisines: Chinese, Thai, Vietnamese, Korean and Indian.

Beside rice noodles and stir-fry tofu, one of his favorites was saag, an Indian spinach dish. Pureed and stewed beyond recognition this dish has a great flavor, every restaurant seems to have their own recipe. Saag can be a great side by itself, or add farmers cheese for saag paneer, or add chicken, tofu, or legumes to make a main course.

I remember Bob the Builder fondly, even if I did break up with him, and I had a craving for this warm, comforting dish that I first made for him.

Saag
2lb spinach and other greens, such as collard greens, mustard green, etc
2 small yellow onions
4 cloves garlic
1 1/2 inch fresh ginger
2 tsp salt
3 tbsp tumeric
1tbsp garam masala
Wash and chop spinach. Fill a medium sauce pan about 1/4 full with water, add vegetables and simmer for 45 minutes

In a blender puree the spinach in batches and return to pot

Chop the onions finely and mince the garlic and ginger as fine as possible. Saute the onions until they are translucent. Add the garlic and ginger, cook until soft. Add sallt, turmeric and garam masala and stir until everything is well mixed.

Add onion mixture to spinach and simmer until it is the desired consistancy. At this point it will more closely resemble a science project and will glorp and burbly like a volcano. I assure you, it tastes great too.

October 13, 2008

stuffed tomatoes save the day


This past Thursday I was fortunate enough to have the day off work for Yom Kippor. I did not fast on this Jewish day of atonement, but I did spend the day in meditation. In the kitchen.

Since it is so unusual for me to have a day off, the Trainer decided to stay home for the morning to spend time with me. His day did not begin so well. He awoke to find that we were out of coffee filters and had to trek out in search of them, finally finding them at the place I would have assumed would his first stop.

While making the coffee he burned his pancake, then tore it up in a pique, muttering how it was going to be such a bad day. I salvaged breakfast with some Tropical Squash Bread from the freezer and things calmed down as we sat with our coffee for a few minutes.

Soon after retreating to our nest it was time to start the special lunch or Bison Stuffed Tomatoes that I had planned for our morning together. I was interrupted in this by the real day saver, thanks to my friends C and J. Knowing that I would be home, C sent me an Edible Arrangement as a belated birthday gift. (J is currently deployed overseas) The Trainer answered the door, and nearly turned the delivery guy away since we weren't expecting anything, let alone a huge bouquet of fruit.

We were so surprised, and the Trainer so impressed, that everything had to stop so that I could open and photograph the masterpiece before the fruit was eaten. This, of course, put me behind in my lunch preparations. On the other hand, it brought us together and I've never seen the Trainer eat so much fruit at one time.

I quickly got back to our lunch, preheating the oven, sauteing the meat, scooping out the tomatoes. All with the Trainer hovering at my shoulder asking when we were going to eat and reminding me that we said lunch would be at 11:30. Never tell a Hungry Man (or as I sometimes call him, my Very Hungry Caterpillar) that something will take 30 minutes in the oven. With hungry masculine selective hearing they hear 30 minutes and can't comprehend the prep time. Luckily I got the tomatoes into the oven and they didn't take as long in the oven as I had estimated.

We enjoyed our lunch, and the Trainer was quite impressed with the stuffed tomatoes. The day was officially saved! I had him to myself for another short hour before he headed to the gym and I got down and dirty making burgers for the next two weeks.

Bison Stuffed Tomatoes

1lb- ground bison meat, or other ground meat
1- red onion, chopped
3- cloves garlic, chopped
6Tbsp- chopped fresh cilantro
1Tbdp- chili powder
1tsp- ground cumin
1tsp- kosher salt
1/2 tsp- fresh ground black pepper
5- large ripe tomatoes
1/3 cup- almond meal
1Tbsp- olive oil


Preheat oven to 350 F.

In a large skillet saute the onion and garlic with a small amount of vegetable oil.

Add the bison meat, 3Tbsp cilantro, chili powder, cumin, salt and pepper and brwon the meat, breaking it up into small chunks.

While the meat is cooking prepare the tomatoes. Cut of the tops, about 1cm from the base of the stem. Scoop out insides into a bowl. Save the flesh and discard the seeds.

Chop the tomato flesh and tops and add to the meat.

Arrange the tomatoes in a foil lined baking dish.

Fill each tomato as full as possible with the bison mixture. Sprinkle reserved cilantro on top.

In a small bowl toss together almond meal and olive oil.

Top each a tomato with a small amount of almond meal mixture and shake a little salt over the whole pan.

Bake for 20-25 minutes, until tomatoes have split thier skins and almond meal topping is toasted light brown.

October 3, 2008

Slow Food For Fall

I'm a few days late for Naomi's Go Ahead Honey, It's Gluten Free event, but maybe she'll let me slide under the wire. This month's theme is slow food. The slowest food I can think of is my mother's turkey soup. Every Thanksgiving, except one, Mom roasted a huge turkey for our family of three, or four while Nonna was with us. I'm talking 20 pounds, in the oven ALL day, big kinda turkey.

After everyone ate turkey for several days Mom would cut the remaining meat from the bones and boil the bones in her huge soup pot. Th pot stayed on the stove for several days, simmering away. After two days of simmering the bones she removed them from the stock and placed the pot outside on th
e deck to cool. The next morning Mom skimmed the fat from the surface and began freezing bags or turkey stock.

We always had a big pot of turkey soup made from the last of the Thanksgiving bird, and homemade turkey soup was Mom's answer to all of winters sniffs, sniffles and dark days. Her soups were always peppery sharp and hearty. She added chunks of roast turkey or chicken, onions, carrots, celery, lots of garlic and pepper. Rice got fat soaking up the stock and fresh grated parmesan and pecorino topped these love fill
ed bowls she placed before us.
If that's not slow food, I don't know what is.

I have neither the tools, space, or kitchen time to cook this the way Mom did. Maybe one day I'll have a kitchen of my own, but until then, I can always make Mom's feel better soup like this.


1 bone-in chicken breast, with or without skin
2 white onions
6 cloves garlic
3 stalks celery
1 bunch parsley
1 huge carrot
3 bay leaves
olive oil
fresh ground pepper
kosher salt

In a large soup pot, stock pot slow cooker place the rinsed chicken, 1 onion, 3 smashed cloves of garlic, 1 stalk of celery, 1/2 the parsley and bay leaves. Simmer for at least three hours.

Allow stock to cool, then remove chicken, onion, garlic, celery, parsley and bay leaves. Discard the vegetables.

In a large bowl or on a plate, pick all the chicken meat from the bones, shredding it into small pieces.

Chill the stock and skim the congealed fat from the surface if desired.

Chop the remaining vegetables. Heat a skillet with olive oil and begin sauteing the garlic and onions on low heat. When they are translucent and the carrots and let them sweat, covered, until they are slightly crisper than you would like. Add the celery and continue cooking until the celery is cooked.

Return the chicken and vegetables to the stock, add remainder of the parsley, chopped, and season with salt and fresh ground pepper.

If you can eat rice or grains, add any cooked rice or grain of your choice and serve.

* Mom always cooked the rice separately and added it only at the very end, into each bowl separately. If we stored the leftover soup and rice together, by the next night the rice had soaked up all the liquid and it no longer resembled soup.

**I always loved to add lots of fresh cheese to the left overs, I guess that was me making my very first risotto.

September 30, 2008

A Little Jar of Summer


The weekend I returned from Alaska, I was craving something bright. Pesto, to be exact. Bright, spicy little bites of summer that remind me of warm afternoons with my Nonna. I think I got the last batch of local basil from my green market, and now I have my own little jar of summer, sitting in the door of the refrigerator.

Pesto

6oz fresh basil
3cloves garlic
1/2c. pine nuts
1-2tbsp olive oil
Kosher or Sea salt


Wash and dry the basil, removing any browned leaves, stems are fine. Peel and lightly chop the garlic.

Place basil, garlic and pine nuts in the blender and blitz quickly. Add a drizzle of olive oil and pinch of salt and blitz again. Stop when it resembles a paste.

Pesto is best when everything is not completely blended and homogeneous.

Store in a jar or airtight tub it the refrigerator

September 25, 2008

Fall Comfort Food

Here I sit, at my small home desk with my cup of Sleepytime tea and a small dish of incinerated nuts (my last attempt at roasting in an unpredictable oven), the first fall rain is pattering against the window and I am finally trying to decompress after a very long four days.

It auction season, all the big houses have sales in the next few weeks, Doyle's, Sotheby's, Christie's, so things are hectic at work to say the least. Our neighbors were evicted and the landlord decided to fully exterminate both the vacant apartment and ours, we're the only two on the floor, on Wednesday. Tuesday the Trainer and I, and his family, had to remove all our clothes and books from the apartment, only to put it all away again Wednesday evening. The past few evenings they have been doing work next door as well, last night until after 11pm.

I'm very glad that I had the foresight to prepare some comfort food last weekend. I roasted a large spaghetti squash and prepared a batch of my Nonna's pasta sauce to go with it. I hadn't planned on eating it every day, but it's warm and comforting, and it's all ready for me to grab from the freezer. I learned how to make this pasta sauce from my Nonna and my uncle and I certainly don't follow a recipe, but I do follow a few guidelines.


Spaghetti Squash
Clean the outside of a spaghetti squash and cut it in half. Preheat the oven to 350 degrees. Place both halves of the squash cut side down on a baking sheet. Bake for 30-45 minutes depending on the size of the squash. When it's cool enough to handle scrape the meat with a fork to create the spaghetti-like strands and scoop out the flesh with a spoon.

Nonna's Pasta Sauce
1lb- ground beef
1- onion
5cloves- garlic
6- Roma tomatoes
4- vine ripe tomatoes
1/2bunch- parsley
2tsp- Italian seasoning (basil, oregano, majoram, thyme, savory, sage & rosemary)
Olive oil
Sea salt

To prep- chop the onions and garlic, wash the Roma tomatoes and remove the stem part and peel the vine ripe tomatoes*

Sautee onions and garlic in olive oil with 1tsp seasoning until translucent.

Remove 2/3 of the onion mixture and place in blender.

Add ground beef to remaining onions and sautee, breaking up into clumps of desired size.

In blender, puree onions and Roma tomatoes.

Transfer meat and tomato puree to a sauce pan, add peeled, chopped vine ripe tomatoes, remaining seasoning and chopped parsley. Simmer for at least 1 hour until flavors are well blended.


*to easily peel the tomatoes score an X over the stem and place tomatoes top down in a heat proof bowl. Cover with boiling water. After a few minutes, rinse in cold water and remove peels

August 19, 2008

Breakfast Tortilla Roll-Up

Some of you maybe wondering what this egg white, flax and blueberries thing is on my menu. Eggs and blueberries together? What an odd combination.

Well, my friends, it's a great combination! I've perfected it and it tastes an awful lot like a blueberry crepe or pancake.

I've always been a little curious about crepe, and never quite able to make one myself. (I'm still working on that, by the way) And then I saw recipes for egg crepes from both Naomi and Carol. The only thing was, I want a more substantial, protein packed breakfast, like an omelet only now milk is out on the SCD.

Enter my second cultural influence: the Trainers mother. On Friday nights when none of us kids are home for dinner she'll make herself a tortilla with some left over meat and rice. In South America, at least those countries that were once Gran Columbia, a tortilla is whisked eggs cooked in a pan with meat and potatoes or vegetables and resembles an Italian fritata.

We begin to see just how universal a dish like this is. And after several days of delicious experimentation I present my own version.
Breakfast Tortilla Roll-Up

3-egg whites
1-tbsp flax meal (Blood Type O) or nut meal (SCD)
1-dash GF SCD vanilla extract
1/3 cup blueberries

•In a bowl whisk egg whites (or whole eggs if you wish), flax, vanilla and sea salt until frothy

•Heat and oil a skillet.

•Pour eggs into skillet and swirl around so the eggs are evenly distributed.

•When the eggs are cooked through spread the blueberries along one edge.

•With a metal spatula or two spoons carefully roll the tortilla from one edge.

This tortilla base could alternately be used with any type of filling, sweet or savory. I'm thinking burrito, dosa, anything you can imagine.


Sent from my iPhone